ESP32实现WEB服务程序(Vue3+element-plus)
🚀 ESP32 WEB服务 | Vue3 + Element-Plus 构建现代化前端
- 💡 碎碎念😎:本文档基于官方 restful_server 示例进行改进,官方示例使用的是 Vue2 和 Vuetify2,本文将其替换为 Vue3 和 Element-Plus,优化前端开发体验。
- 📺 视频教程:暂无
- 💾 示例程序:ESP32-Guide/code/09.extra/restful_server_vue3
- 📚 官方示例程序:ESP32 RESTful Server 示例
一、测试原始官方历程
1.1 示例程序介绍
首先我们尝试使用一下官方原有的示例程序restful_server,简单了解一下项目功能和文件结构:
首先请自行下载官方示例程序,拷贝到自己存放项目的位置,项目目录如下:
.
├── CMakeLists.txt
├── front
│   └── web-demo               // 前端项目
├── main
│   ├── CMakeLists.txt
│   ├── esp_rest_main.c
│   ├── idf_component.yml
│   ├── Kconfig.projbuild
│   └── rest_server.c
├── partitions_example.csv
├── README.md
├── sdkconfig.defaults
└── sdkconfig.defaults.esp32p4我们本节的目标就是将web-demo 部分的技术栈更新为Vue3+element-plus,接下来我们开始尝试编译官方项目:
1.2 编译并烧录示例项目
使用命令设备目标芯片,我这里使用ESP32S3:
idf.py set-target esp32s3然后使用idf.py menuconfig命令对项目进行基本的配置:
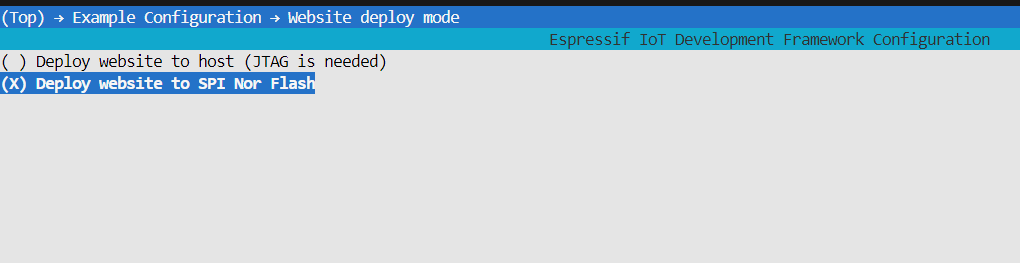
首先修改要连接的WIFI名和密码:

然后修改文件系统挂载到flash里:
修改完成后使用idf.py build编译项目,会有如下报错信息:

提示我们找不到···/front/web-demo/dist这个目录,这个目录是构建完成的网页文件,在main组件的CMakeLists.txt文件里可以看到:
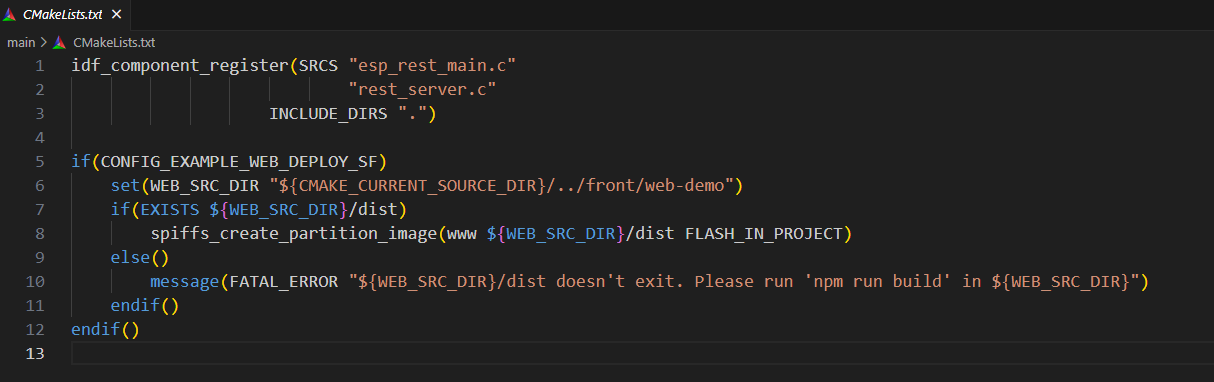
后面这个if块里的代码是用于在构建ESP32项目时,将Web前端资源(构建后的静态文件)部署到ESP32的SPIFFS文件系统中。确保Web前端资源已经构建好(即存在dist目录),并将它们正确打包到设备上。如果Web资源没有构建,脚本会停止构建并给出错误提示。
下面我们先去构建(编译)Web资源,构建Web需要使用Node.js环境,我们先安装一下:
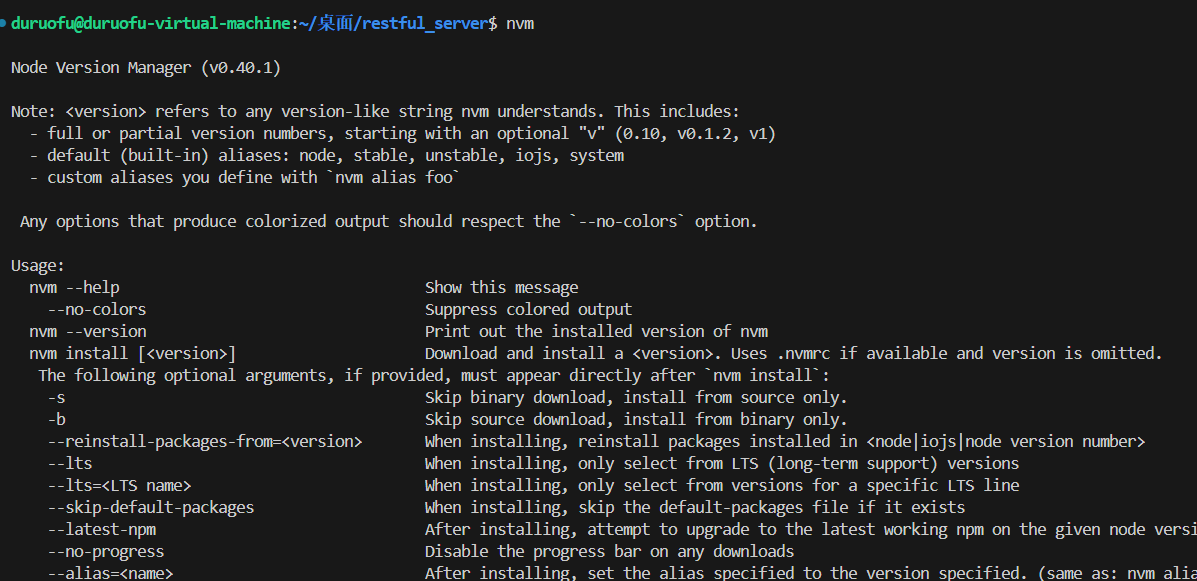
安装Node.js推荐使用[NVM],NVM 是 node.js 的版本管理器,方便我们使用多个版本的Node。使用下面的命令安装NVM:
curl -o- https://raw.githubusercontent.com/nvm-sh/nvm/v0.40.1/install.sh | bash输入nvm验证,可以看到NVM已经安装好了(需要新打开一个终端):
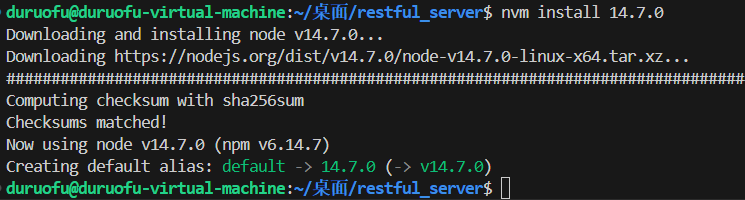
使用nvm install 14.7.0命令安装V14.7.0版本的Ndoe.js(示例工程的前端项目较为老旧,这里使用低版本的Node):
进入前端项目文件夹,使用npm i命令下载依赖:
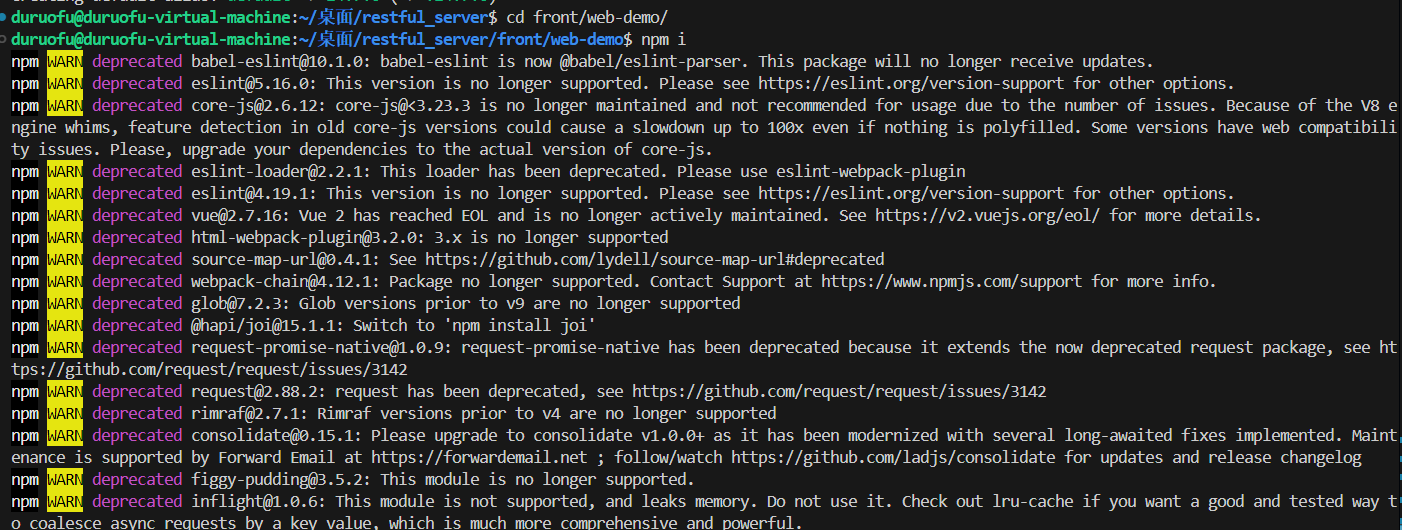
可以看到,示例里的前端项目实在是太老旧了,所依赖的大部分库的对应版本已经停止支持了。下载完成后使用npm run build构建项目:
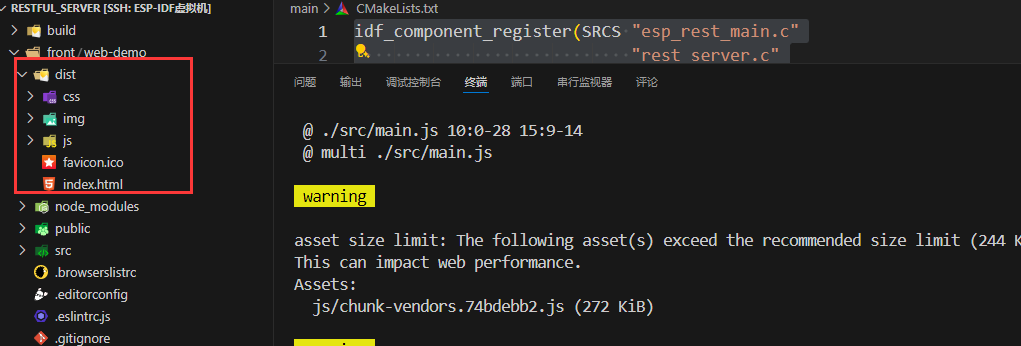
运行完成后,前端目录下就会多出我们需要的dist文件夹。
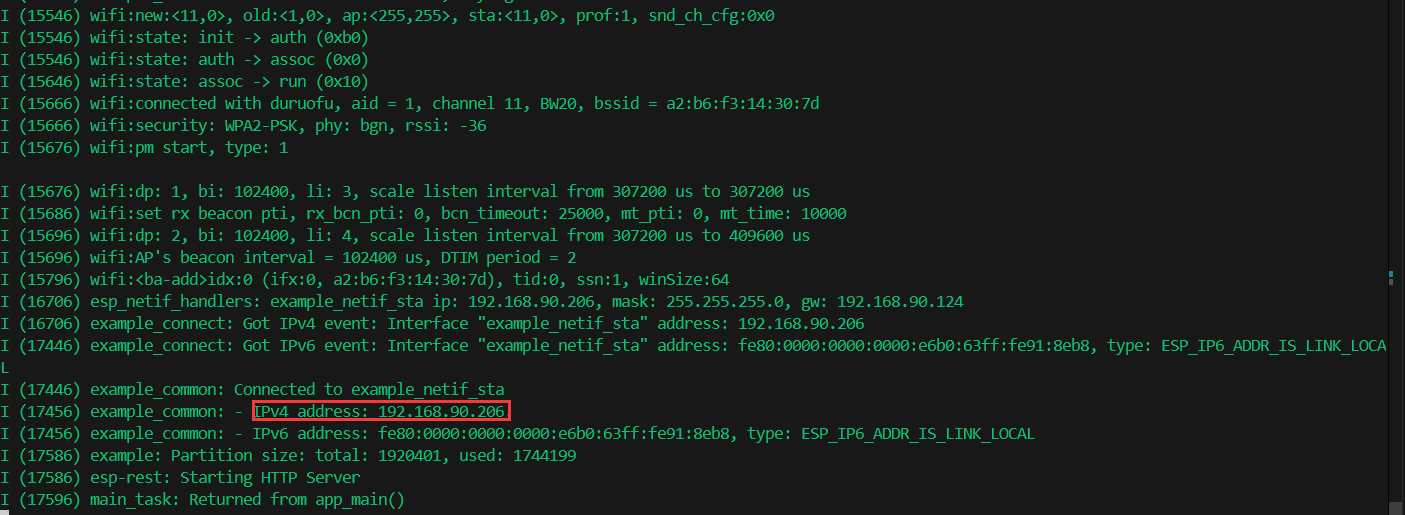
回到项目根目录,使用命令$ idf.py -p PORT build flash monitor 编译烧录代码,这里的PORT是开发板对应的端口,烧录成功,ESP32连接到WiFi之后,会打印出自己的IP地址:
访问即可看到前端页面: 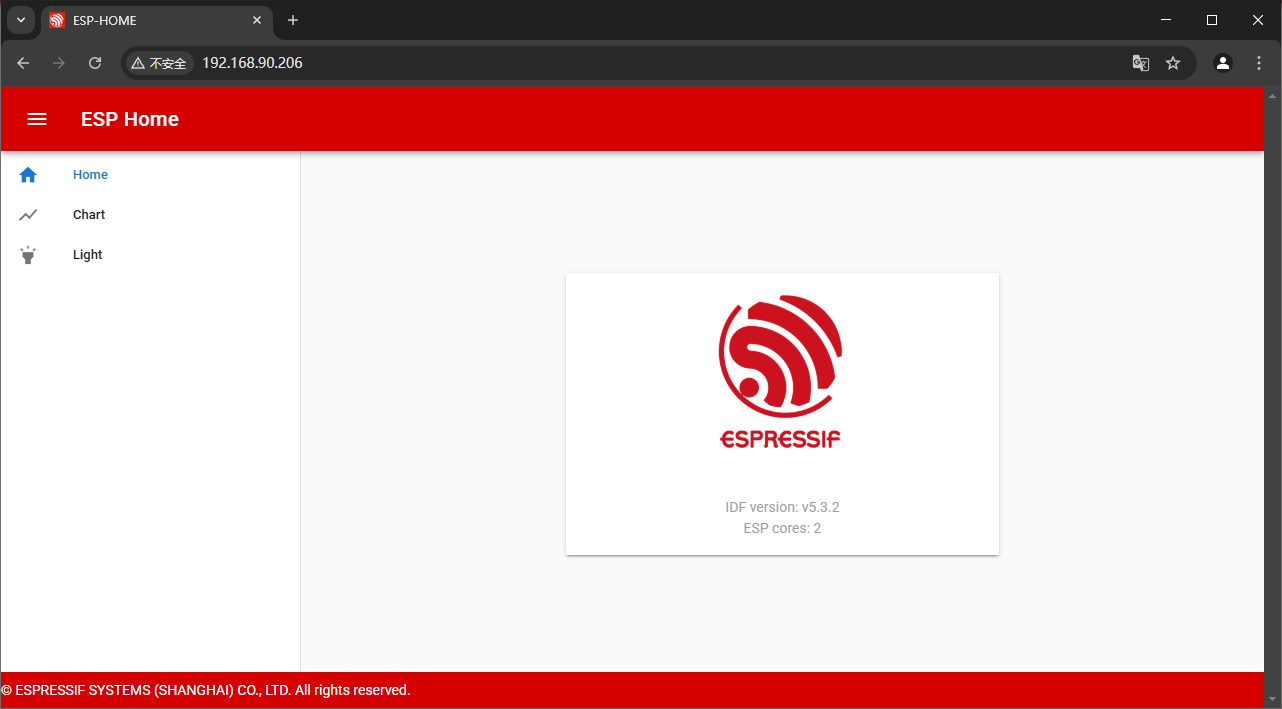
1.3 示例项目代码分析
暂无
二、使用Vue3构建新前端
2.1 新建Vue3项目并测试
[!WARING] 注意: Vue3需要使用 18.3 或更高版本的 Node.js,可以直接使用
nvm install node安装最新版
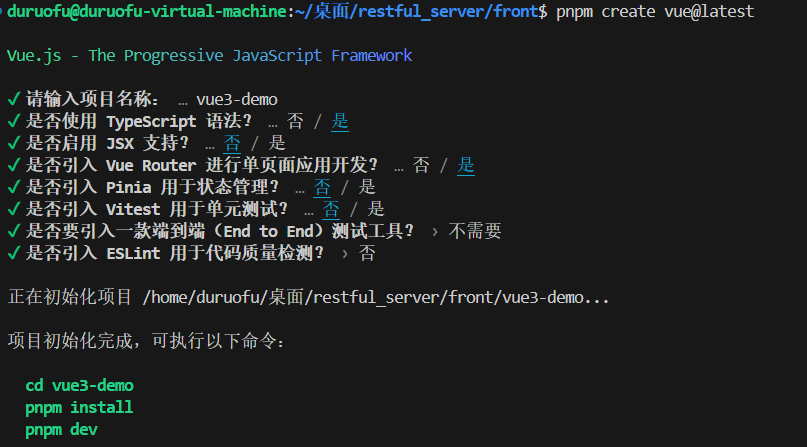
在front目录下新建一个Vue3项目,可以参考Vue3官方文档:创建一个 Vue 应用
创建项目:pnpm create vue@latest,对应的选项可以按照个人习惯进行选择:
进入到新建的Vue3项目文件夹里,使用pnpm install下载依赖,然后使用pnpm dev预览项目
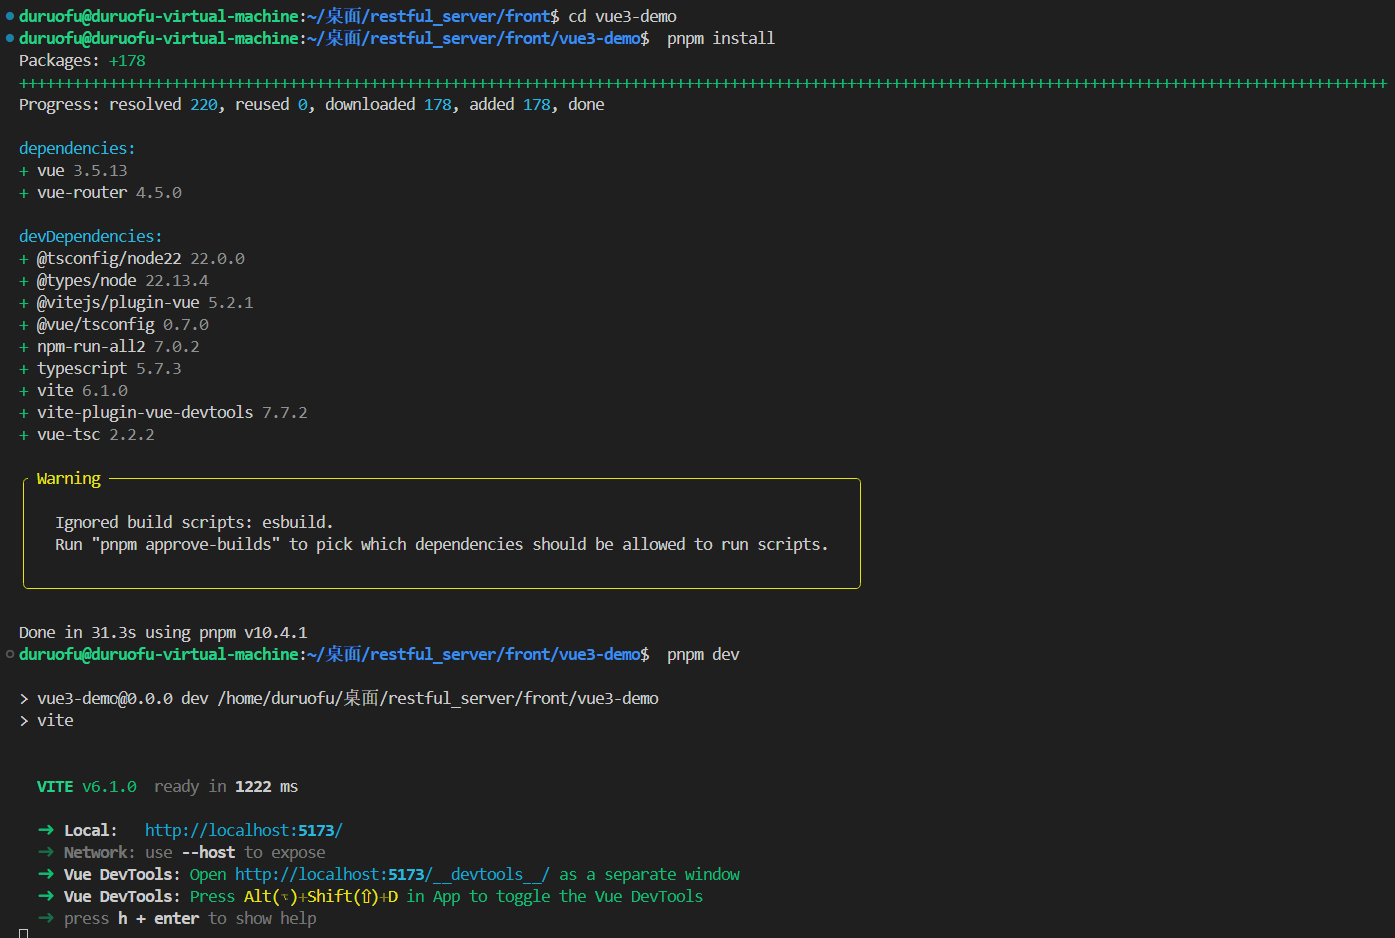
预览效果如下:

然后还是先编译工程,烧录到开发板进行测试,使用pnpm run build构建前端项目: 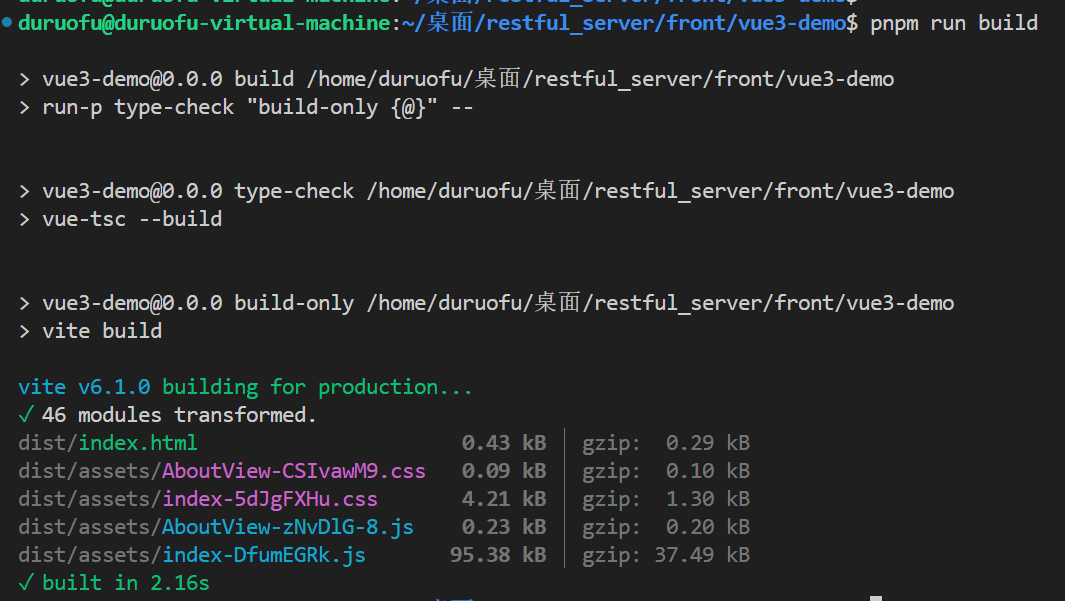
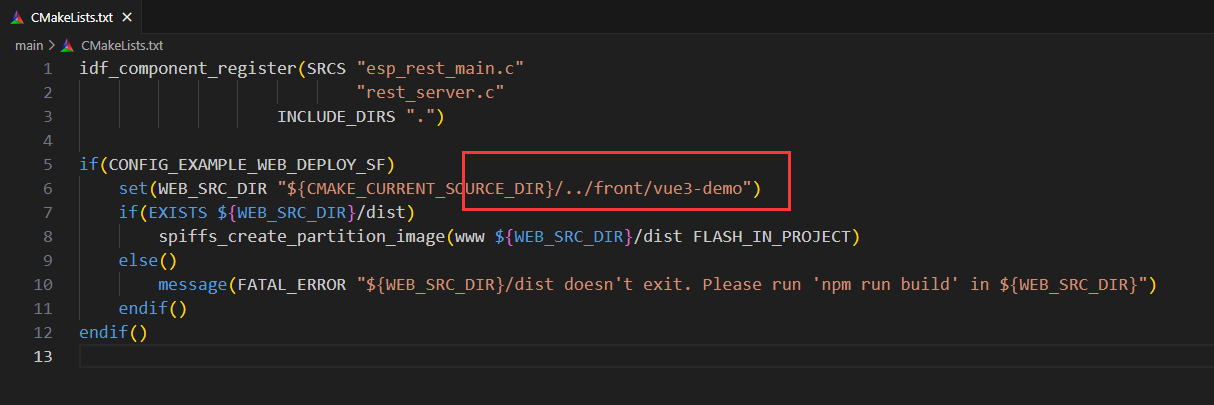
然后修改main组件下的CMakeLists.txt文件,替换前端目录为新的vue3-demo:
编译烧录代码,再在浏览器输入ESP32的IP地址(注意要在同一局域网),可以看到新网页已经成功被ESP32托管:
2.2 Vue3项目添加必要功能
1. 引入Element Plus UI库
Element Plus是一款非常优秀的基于Vue3的UI库,在Vue项目开发中使用非常广泛。
安装Element Plus,执行:
pnpm add element-plus全局引入:
引入Element Plus,修改·······vue3-demo/src/renderer/main.ts:
// import './assets/main.css'

import { createApp } from 'vue'
import App from './App.vue'
import router from './router'

// 引入element-plus
import ElementPlus from 'element-plus'
import 'element-plus/dist/index.css'

const app = createApp(App)

app.use(router)
app.use(ElementPlus)
app.mount('#app')然后修改src/renderer/App.vue来验证下Element Plus:
<template>
  <div class="App">
    Electron-Vite-Vue-App
    <el-button type="primary" @click="showDialog">Primary</el-button>
  </div>
</template>

<script setup>
import { ref } from 'vue';
import { ElMessageBox } from 'element-plus';

const showDialog = () => {
  ElMessageBox.alert('按钮被按下了!', '提示', {
    confirmButtonText: '确定',
  });
};
</script>

<style scoped>
/* 可以在这里添加样式 */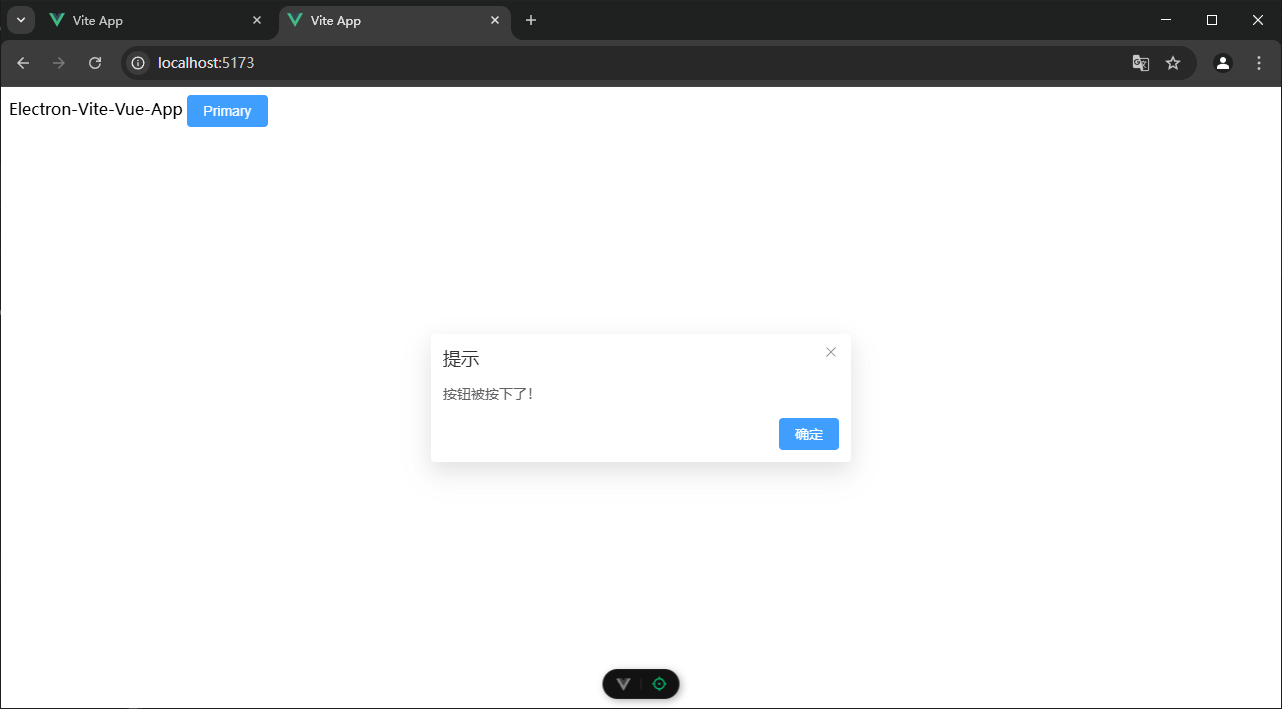
</style>效果:
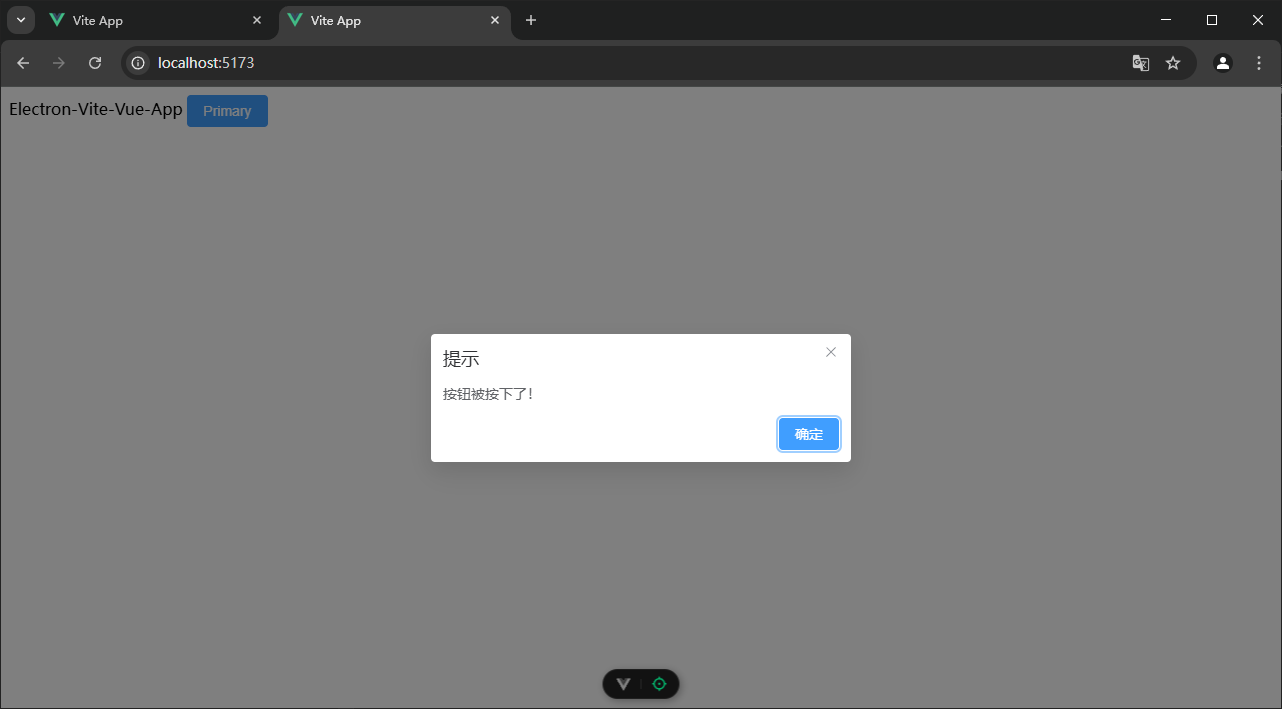
可以看到Element Plus的el-button组件正常显示出来了,之后我们就可以正常使用Element Plus来编写页面了
按需引入:
全局引入Element Plus,进行项目构建时,会默认把所有的组件打包进去,导致文件体积比较大,如下:
这对于嵌入式项目是不能容忍的,所以我们要考虑使用按需引入组件的方式:
需要安装按需引入插件:
npm install -D unplugin-vue-components unplugin-auto-import然后vite.config.ts文件中配置:
// vite.config.ts
import { defineConfig } from 'vite'
import AutoImport from 'unplugin-auto-import/vite'
import Components from 'unplugin-vue-components/vite'
import { ElementPlusResolver } from 'unplugin-vue-components/resolvers'

export default defineConfig({
  // ...
  plugins: [
    // ...
    AutoImport({
      resolvers: [ElementPlusResolver()],
    }),
    Components({
      resolvers: [ElementPlusResolver()],
    }),
  ],
})然后去除App.vue里的全局引入,接着预览工程:
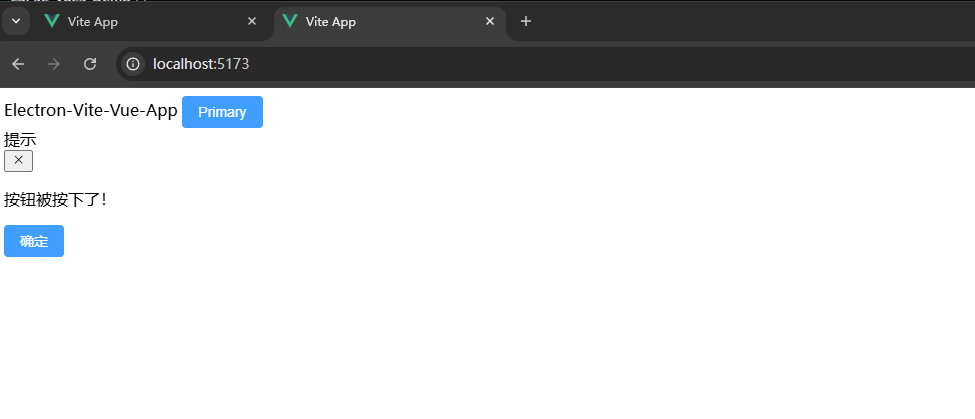
会发现ElMessageBox组件的样式丢失了,针对这样的情况,我们需要手动在main.ts里引入一下样式:
// 手动引入element-plus的css文件
import "element-plus/theme-chalk/el-message-box.css";缺失什么样式就补什么样式文件,效果:
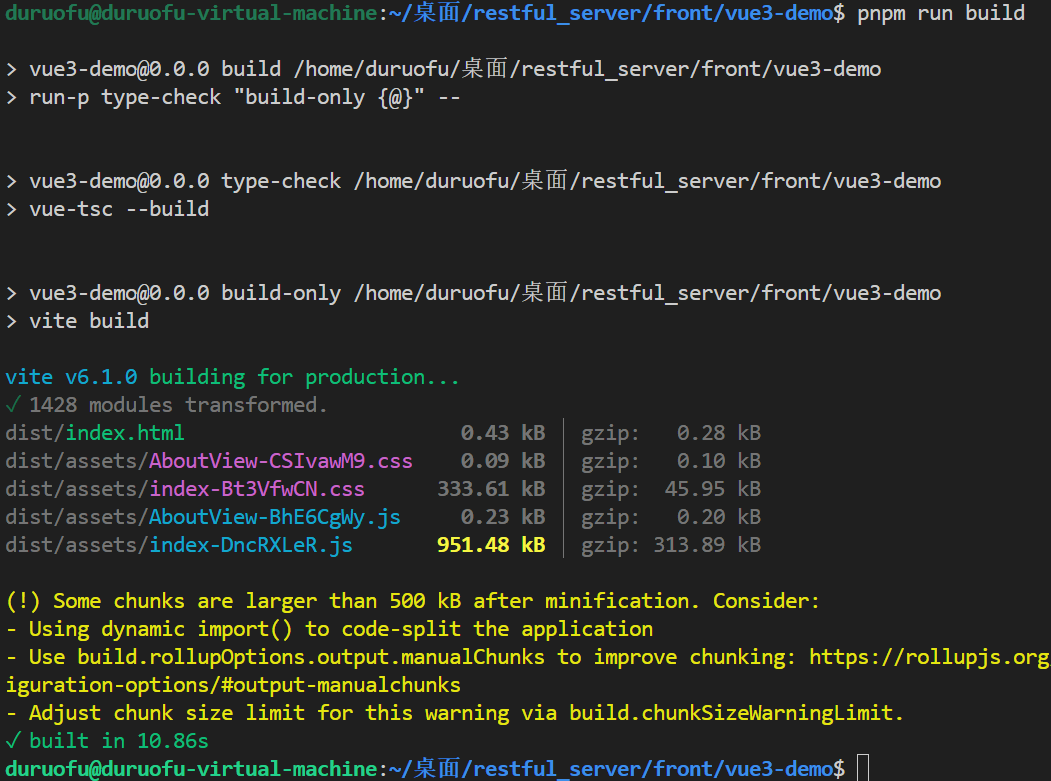
在次构建代码:
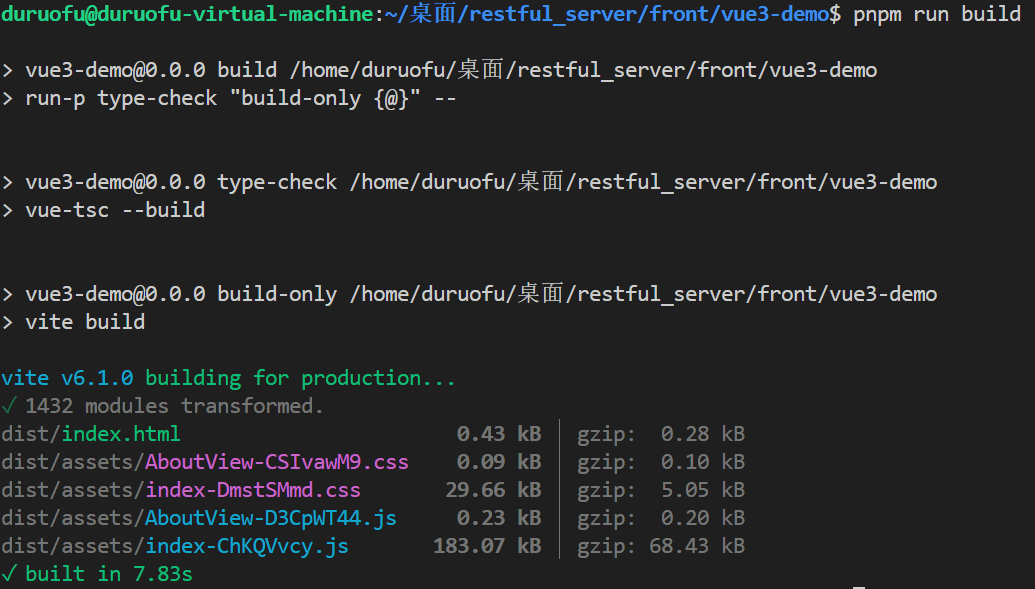
可以看到编译产物小了很多。
2.引入Axios与ESP32通信
Axios 是一个基于 promise 的网络请求库,可以用于浏览器和 node.js。Axios 使用简单,包尺寸小且提供了易于扩展的接口。
安装:pnpm i axios
使用:我们在App.vue里简单调用一下Axios来与ESP32通信 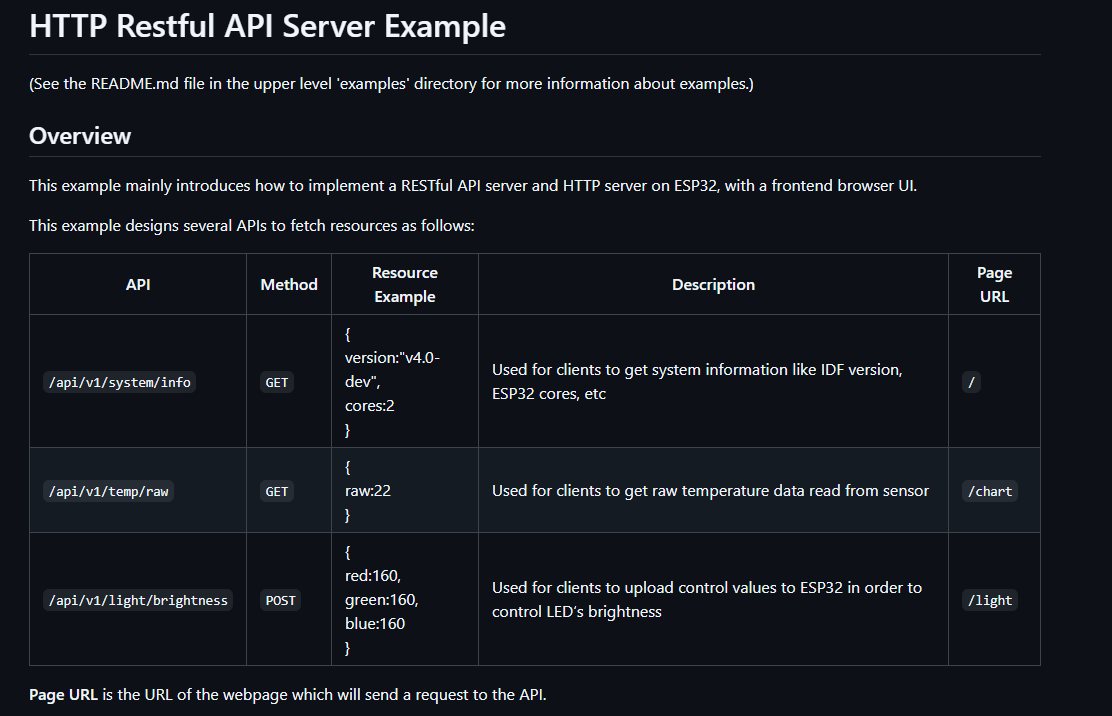 ESP32的程序里提供了三个可供访问的路径,这里我们简单测试访问一下
/api/v1/system/info:
// App.veu
<template>
  <div class="page">
    <h1>version</h1>
    <p>{{ version }}</p>
    <el-button type="primary" @click="getVersionButton">Primary</el-button>
  </div>
</template>

<script setup lang="ts">

import { ref } from 'vue'
import axios from 'axios';
const version = ref('')

const getVersionButton = () => {

  axios.get('/api/v1/system/info').then((res) => {
    version.value = res.data.version
  }).catch((err) => {
    console.log(err)
  })
}
</script>

<style scoped lang="scss">
.page {
  text-align: center;
  margin: 20px;
}

.page h1 {
  font-size: 2em;
  margin-bottom: 10px;
}

.page p {
  font-size: 1.2em;
}
</style>还需要 vite.config.ts在里添加服务代理配置:
export default defineConfig({
  ·········
  server: {
    cors: true,
    proxy: {
      '/api': {
        target: 'http://192.168.167.206:80',
        //target: 'http://esp-home.local:80',
        changeOrigin: true,
        ws: true
      }
    }
  },
})这里的IP地址需要替换为ESP32实际的IP地址,然后测试:
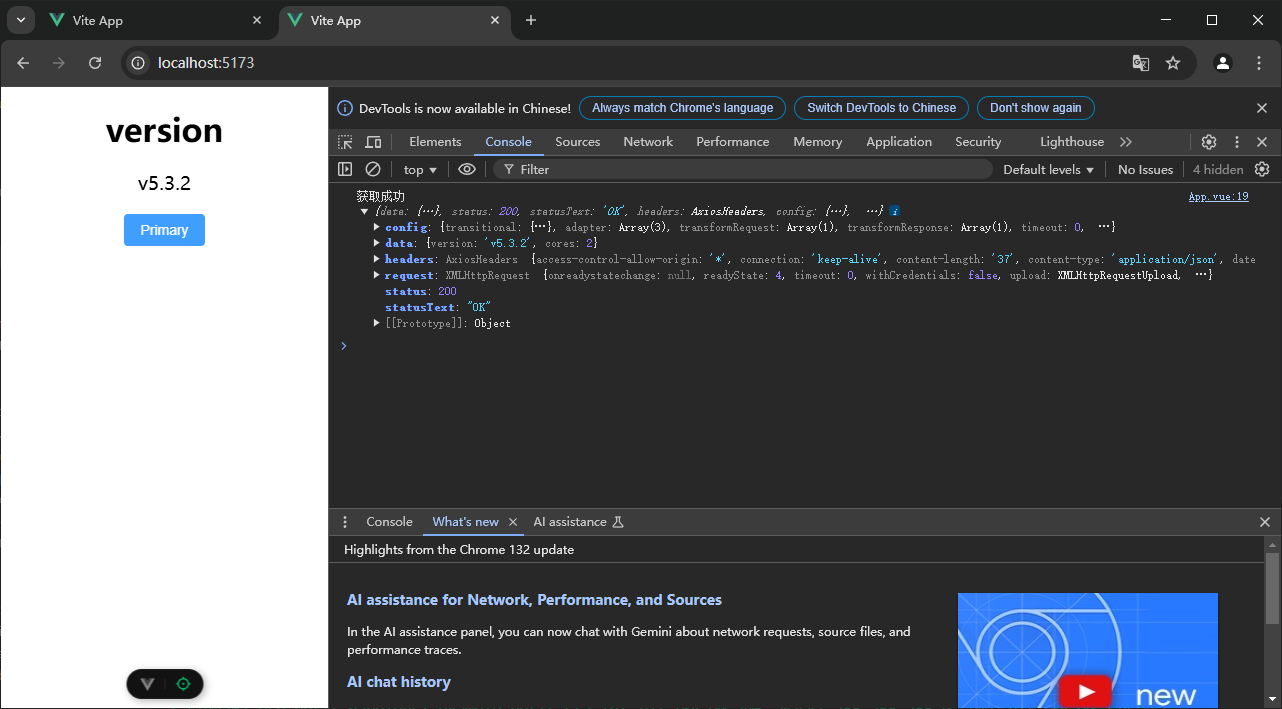
可以成功获取ESP-IDF版本,实现前后端通信。
这里需要注意,实际使用时,随着ESP32连接网络的变化,IP也会产生变化。如果在vite.config.ts里写死IP,当ESP32的IP产生变化时,网页通讯就失效了。
这里可以参考官方方案:
The IP address of an IoT device may vary from time to time, so it’s impracticable to hard code the IP address in the webpage. In this example, we use the to parse the domain name , so that we can always get access to the web server by this URL no matter what the real IP address behind it. See here for more information about mDNS.mDNSesp-home.local
我们在最终网页完工时,可以将 vite.config.ts里的服务代理配置修改为
export default defineConfig({
  ·········
  server: {
    cors: true,
    proxy: {
      '/api': {
        target: 'http://esp-home.local:80',
        changeOrigin: true,
        ws: true
      }
    }
  },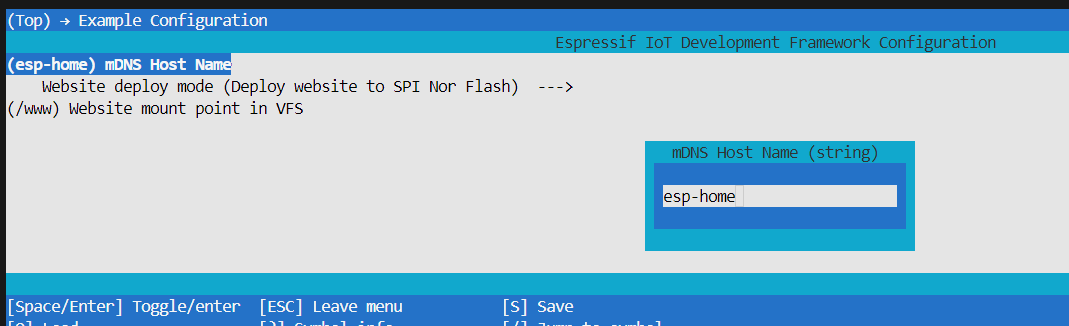
})这里的esp-home这个名称是我们在ESP32程序里配置的:
支持我们就基本完成了一个新的前端项目的构建。
下面的链接是本文对应提供的参考项目: